Contributing to React Native Elements
Thanks for taking the time to checkout this project and being willing to contribute!
Here are some of some of ways you can help:
- Reporting Bugs
- Suggesting a feature
- Responding to Issues
- Improving the Documentation
- Implementing Bug Fixes and Improvements
Reporting Bugs
React Native Elements has over 9000 users actively developing and using this library in their projects. With that many use cases, bugs are sure to come up from time to time. When you think you've found a bug, here's what to do:
Check your version. A fix may have already been released in new a newer version. Update your version of react-native-elements to the latest.
Search the existing issues and pull requests. If you see one, add a 👍 reaction (please no +1 comments). Read through the comments and see if you can provide anymore valuable information to the thread. The more use cases we have, the easier it is to solve the issue.
If there are no other issues like yours, then create a new one. New issues come with a issue template, so make sure to fill out as much information as possible. If possible, please also provide a snack demonstrating the issue.
If this is your first open source contribution, please take a look at this guide.
Suggesting a feature
Have a cool idea for a component? Think you can implement an existing feature better? Go ahead and open and issue, describe what you want to accomplish and lastly, why you think React Native Elements would benefit from it.
A few things to consider/add:
- As clearly as possible, attach screenshots, concepts of how this feature should behave
- Do you have any thoughts on how to implement this feature? Have you done something similar already?
- Hold off on submitting feature pull requests until the feature has been discussed. Once the feature has been established and agreed upon, create the pull request.
Responding to Issues
When someone posts an issue, a maintainer might not be able to respond right away. Or a person may post and issue that has incomplete information. As a contributor you can help by answering the issue yourself if you know the cause of it, or help the maintainers by making sure all the information necessary to validate the issue is there.
Improving the Documentation
Our documentation is built with an open-source tool called Docusaurus. It has a ton of great features, the most important being versioning - which allows us to have documentation for every version we release.
The easiest way to contribute to a particular doc is through the Edit button on the page. It'll take you directly to the exact file for that page on the repo.
Since all documents are versioned, it might be bit tricky to find which file needs changing. You can use the rule below to figure out which file you need to edit.
Changes for an existing doc on a version not yet released
These files are located in the /docs folder. So if I wanted to add a new prop
on the Avatar component, I'll need to document that in /docs/avatar.md.
Adding documentation for a new component
The component API in the docs/main/ is auto-generated from the TSDoc in the TypeScript declarations. Be sure to update the documentation in the corresponding, run:
yarn docs-build-api
If you need to create any other doc page, you'll be creating your .mdx file in the /docs/main folder. Be sure to fill out the header at the top of the file:
---
slug: /component
id: my-component
title: My Component
---
Lastly you'll need to add it to sidebar. This sidebar file is
/website/sidebars.json. Then add the id from the document we just created
into one of the sidebars.
Rewording, adding missed info, or making a typo for a released version
These files are located in:
/website/versioned_docs/version-{version_name}/{file-name}.
The last
directory will differ depending on what version you are submitting docs for.
Docusaurus only creates new versions of files if the
originaldocument in the/docsfolder has changed since a release was made.
If I added docs for Avatar.md and it was our ever first release say 0.19.0,
when releasing that version it'll create
/website/versioned_docs/version-0.19.0/avatar.md.
Now if I go to release 0.20.0 and didn't change /docs/Avatar.md, then
they'll be no /website/versioned_docs/version-0.20.0/avatar.md. Docusaurus
will simply point to the old version from 0.19.0.
Editing an existing page that's not docs or components
These files are located in: /website/docs/.
Editing a document that appears the same in all versions
This one is particularly the most complicated and requires a bit of duplication.
Let's say we want edit the Getting Started doc. We want this document to be
the same for all versions. Firstly we'll need to make edits to
/docs/getting_started.md so it's available in future versions. Secondly we'll
need to duplicate those changes in
/website/versioned_docs/version-{version-number}/getting_started.md.
We'll only need to make this change to the first set of versioned docs. In
our case /website/versioned_docs/version-0.19.0/getting_started.md.
Be sure to check out the documentation over at docusaurus.io if you have any other queries.
Implementing Bug Fixes and Improvements
If you wish to submit a pull request for a new feature or issue then this is guide for you. On GitHub, we extensively use labels to reflect the content and status of issues.
For all issues that are bugs check here.
Improvements are separated into two categories:
Check out the Labels guide for a more descriptive info on our usage of labels.
To begin you should start by forking this repository first. This should get you setup on your local machine:
Setup
Install Node.js and and yarn if you have not already. (We suggest you to use node v14x)
Fork the react-native-elements repo here
Clone the forked repo
 git clone <your-forked-repo-url>
 cd react-native-elements
You have a file structure that looks like this:
.
├── example # demo expo app
├── scripts
├── packages
│   ├── base     # component without theme
│   ├── themed   # component using withTheme HOC
│   └── ....     # rest components having universal device support
└── website
    ├── docs     # prop API docs
    └── scripts  # scripts for autoDocGen
Install dependencies
yarn installWhile developing, you can run the example app with Expo to test your changes:
cd example
yarn start
Make sure your code passes TypeScript and ESLint. Run the following to verify:
yarn typescript
yarn lint
To fix lint or formatting errors, run the following:
yarn lint --fix
yarn format --write
Remember to add tests for your change if possible. Run the unit tests by:
yarn testNow create a new branch with a name that loosely describes the issue on which you will be working. Once you think you have addressed the issue in question, submit a pull request to the
nextbranch.You are done 🎉
Commonly used scripts for contributions
Scripts can be executed via npm run [script] or yarn [script].
build- compiles all packages ready for publishinglint- check for lint issuesformat- check for formatting issuestypescript- check for type build issuedocs-build- build websitedocs-build-api- build component prop APIs
Updating the component API documentation
The component API in the docs/main/ is auto-generated from the TSDoc in the TypeScript declarations. Be sure to update the documentation in the corresponding, run:
yarn docs-build-api
Checks and how to fix them
When you push some changes few CI checks will run, if your PR fails one of them, you can fix it by running the following:
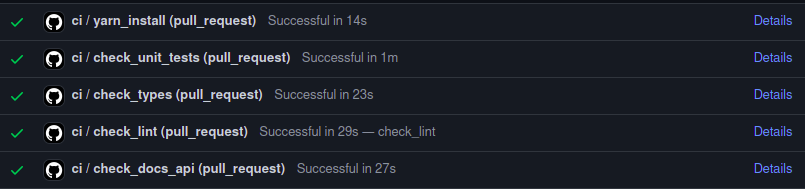
| Check Name | Description | Fix/verify using |
|---|---|---|
yarn_install | Checks change in lock file | yarn install |
check_unit_tests | Jest unit tests for packages | yarn run test |
check_types | Typescript type checks | yarn typescript |
check_lint | Linting/formatting related | yarn lint |
check_docs_api | component API | yarn docs-build-api |
Committing and Pushing Changes
We like to provide informative and useful commit messages when pushing changes to the repo. This helps tremendously when sifting through the commit history to find a particular changeset. A useful guide for creating meaningful commit messages can be found here.
Branching Strategy
There are 3 main branches:
masteris the branch with the most recent deployed versionnextis the main development branch. For new features and enhancements, base the changes off this branch.patchis a branch for working on patch releases. If you have a bug fix that requires a fast release, use this branch.